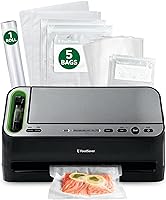
How to Fix a FoodSaver Vacuum Sealer
To fix a FoodSaver vacuum sealer, check the seal area, bag placement, and power first, then clean the gasket and heat strip. Most weak suction and failed seals come from a small blockage, a dirty seal, or a bag that is not seated squarely.
On this page (9 sections)
- Why does my FoodSaver lose suction?
- How do I fix a FoodSaver that vacuums but will not seal?
- What should I check when the machine will not turn on?
- How do I clean the gasket and seal channel without damage?
- Why do my sealed bags leak or come open?
- How do I fix a FoodSaver that keeps stopping mid-cycle?
- When does a repair stop making sense?
- Which replacement suits you if fixing fails?
- How can I prevent the same FoodSaver fix from happening again?
To fix a FoodSaver vacuum sealer, start with power, bag placement, and the seal channel, then clean the gasket and heat strip. That order finds most faults without opening the machine.
You will save a working unit in many cases, and you will know quickly when replacement makes more sense.
This guide explains how to fix a FoodSaver vacuum sealer for the faults owners see most. They include weak suction, bags that do not seal, leaks after sealing, and a machine that does not start.
Each step keeps you safe and keeps the fix simple.
Why does my FoodSaver lose suction?
Weak suction usually means air enters during the cycle or the bag is not seated in the channel. A crumb on the foam gasket, a wrinkled bag edge, or liquid near the mouth can all break the vacuum.
First, unplug the machine and let the heat strip cool. Lift the lid and wipe the foam gasket with a soft, damp cloth.
Remove crumbs, food bits, and roll material from the vacuum channel. Dry the gasket fully before the next try.
Check the bag next. The open end must sit flat, straight, and fully inside the channel.
A fold at the corner lets air in. If the bag is damp, dry the top area or add a small dry paper towel inside, away from the food.
Try a new bag to rule out a torn or thin spot.
If you want to understand how the chamber works before you troubleshoot, read What Exactly Is a Suction Vacuum Sealer?. It explains why a flat bag edge matters so much.
How do I fix a FoodSaver that vacuums but will not seal?
A vacuum that ends without a seal usually points to a cool, dirty, or blocked heat strip. The strip needs clean contact across the full bag width to melt the layers together.
Unplug the unit and let it cool completely. Wipe the heat strip with a soft cloth.
Do not scrape it with a knife or metal pad. Check the seal bar and the area under the lid for melted plastic bits.
Those bits can hold the bag away from the strip.
Confirm you selected the right setting. Dry food needs a seal, moist food may need the moist setting on models that offer it.
The FoodSaver V4400 2-in-1 Vacuum Sealer Machine has automatic moisture detection and switches to the correct mode, according to FoodSaver. That feature helps, but a wet bag edge can still fail.
Test with a fresh, dry bag and no food. If the seal stays cold, the fault is likely the strip, the latch, or the controls.
Stop repeated tries. A cold strip will not improve with more cycles.
What should I check when the machine will not turn on?
No power usually means a plug, outlet, lid switch, or cord fault. Work from the wall toward the machine, and test one change at a time.
Plug it into a known working outlet. Press the lid down firmly, since many models will not run with the lid open.
Check that the power cord is seated and not pinched under the unit. Look for a reset button in the manual for your model.
Try the accessory port only if your model has one and you have a hose connected. A loose hose or port cover can confuse some cycles, but it should not stop basic power.
If the lights stay off after these checks, leave the lid closed and unplugged.
Internal wiring is not a home fix. Do not remove screws or open the housing.
A dead unit with no lights after a plug and lid check needs service or replacement, not more force.
How do I clean the gasket and seal channel without damage?
Clean with a soft damp cloth, mild soap if needed, and no abrasives. The gasket needs to stay soft and flat to hold a vacuum.
Our full guide to how to clean a FoodSaver vacuum sealer covers the drip tray and channel in more detail. For quick fixes, focus on the foam gasket, the vacuum channel, and the seal bar.
Wipe, rinse the cloth, and dry each part.
Do not soak the machine. Do not pour water into the channel.
Keep liquid away from vents and the cord. If you remove a drip tray, empty it and dry it before you refit it.
How often should I clean the seal area?
Wipe the gasket and channel after sticky, juicy, or powdery food. A quick wipe after each use prevents most suction faults.
Pea-sized crumbs can break a seal. Flour, spices, and mar
inade are common culprits. A 30 second wipe takes less time than a failed bag and wasted food.
Make it part of your packing routine.
Why do my sealed bags leak or come open?
Leaks usually come from a wrinkle in the seal, a puncture, or food pressed against the seal. A clean, flat seal line matters more than extra vacuum time.
Hold the sealed bag to the light. Look for gaps, bubbles, or thin spots in the seal.
A gap points to a dirty strip or a bag that shifted. A thin spot can come from too much heat or a bag that was pulled during cooling.
Leave a cool down moment before you move the bag. The seal sets as it cools.
Pulling it early can open a weak line.
Check for punctures from bones, shells, or sharp edges. Bag material can fail at a sharp point even when the seal looks good.
Pad sharp foods or use a thicker bag.
If you seal soup or sauce, freeze the bag flat first, then vacuum it. That keeps liquid away from the seal.
The Bonsenkitchen Vacuum Sealer Machine has a Pulse Vac mode for soft or moist food, according to Bonsenkitchen. That mode control suits foods that deform under full vacuum.
How do I fix a FoodSaver that keeps stopping mid-cycle?
Mid-cycle stops often mean liquid reached the sensor, the lid lifted, or the bag moved. Moisture detection helps on some models, but it cannot fix a soaked channel.
Stop the cycle, unplug the unit, and let the strip cool. Empty the bag and dry the top edge.
Wipe the channel and drip tray. Then try again with a drier bag and less food near the mouth.
Keep the lid pressed down gently during the cycle on models that need latch pressure. Do not open the lid to check progress.
Let the machine finish the vacuum and seal steps.
If the cycle stops at the same point with a fresh dry bag, note the step. A stop during vacuum points to suction.
A stop during seal points to heat or controls. That note helps you decide if a part or a new machine is the better path.
When does a repair stop making sense?
Replace the machine when the motor has no suction, the strip stays cold, or the housing is damaged. Those faults move past simple cleaning and bag checks.
The FoodSaver FM2100 Vacuum Sealer Machine has dual heat sealing strips and one-touch sealing, according to FoodSaver. If a dual strip unit still seals with gaps after a full clean, the strip or latch may be worn.
Repeated burns or cold spots across the seal are a clear sign.
Compare the cost of parts with a new unit. A new gasket can be worth it.
A new heat strip, motor, or control board often is not. Check the manual for part numbers and service options before you spend.
If you are weighing a replacement, our Waring Pro vs FoodSaver: Which Vacuum Sealer Fits Your Needs? comparison helps you match features to your kitchen. It also shows how suction models differ in daily use.
Expect a repair decision within one careful test cycle. If a clean machine, a fresh bag, and a dry seal still fail, do not keep forcing it.
Failed seals waste food and time.
Which replacement suits you if fixing fails?
Pick replacement features from the fault you just found, not from the brand name alone. If seals failed, heat strip quality matters.
If suction failed, gasket and channel design matter.
The FoodSaver V4400 2-in-1 Vacuum Sealer Machine combines a handheld sealer and a standard vacuum sealer, with automatic bag detection and built in roll storage and cutter, according to FoodSaver. It also has a removable drip tray that is dishwasher safe.
That mix suits homes that seal zipper bags, containers, and rolls.
For a smaller counter, read What Exactly Is a Countertop Vacuum Sealer?. It explains size, storage, and where a countertop model fits best.
If your old unit had repeat faults that cleaning did not solve, check NutriChef vacuum sealer problems for related suction and seal patterns. It can help you spot a shared cause, such as bag type or moisture.
How can I prevent the same FoodSaver fix from happening again?
Dry bag edges, clean seals, and correct bag placement prevent most repeat faults. Build those habits into every packing session.
Wipe the gasket after each use. Dry the bag mouth before sealing.
Leave headspace for liquid foods. Cut bags with the built in cutter so edges stay straight.
Let seals cool before you stretch or stack bags.
Store rolls and bags away from heat and dust. Keep the lid closed when the machine sits idle.
That keeps crumbs out of the channel.
To fix a FoodSaver vacuum sealer for good, fix the cause, not just the symptom. A clean gasket and a flat dry bag edge solve most cases.
When the heat strip, motor, or controls fail, choose a replacement with the features your food needs. That simple rule keeps food sealed and saves you repeat repairs.
Frequently asked questions
Why will my FoodSaver vacuum sealer not pull a strong vacuum?
A weak vacuum usually means air is leaking or the bag is not sealed in the chamber. Check the foam gasket for crumbs, confirm the bag end sits flat inside the vacuum channel, and try a fresh bag.
Liquid in the bag can also block suction, so leave space near the seal.
How do I fix a FoodSaver that vacuums but will not seal?
Clean the heat strip and the seal bar, let them cool, and dry both parts. A burnt or dirty strip cannot melt the bag evenly.
Try the seal function again with a dry, flat bag edge.
If the strip does not heat at all, unplug the unit and check the manual for service steps.
When should I replace a FoodSaver instead of fixing it?
Replace it when the motor runs but creates no suction, the heat strip stays cold, or the body is cracked. Also replace it if parts are missing or repair costs exceed the value of a new machine.
Keep the old unit only if a simple part, such as a gasket, solves the fault.