What Exactly Is Vacuum Suction for Home Cooks?
On this page (11 sections)
- Understanding Vacuum Suction in Your Kitchen
- How Vacuum Suction Actually Works
- Key Benefits for Your Home Kitchen
- Common Foods You Can Vacuum Seal
- Vacuum Sealer Machines: What to Look For
- A Simple Step-by-Step Guide to Vacuum Sealing
- What You Should NOT Vacuum Seal
- Checklist for Getting Started with Vacuum Sealing
- Keeping Your Sealer in Top Shape
- Conclusion
- Frequently Asked Questions
Vacuum suction for home cooks is a simple kitchen technique that removes air from plastic bags or containers to preserve food. By creating a tight seal, it drastically slows down spoilage and keeps your groceries fresher for much longer.
Many people use this method for preserving freshness, preventing freezer burn, and saving money on wasted food. We found that it’s especially useful for storing meats, cheeses, and pre-chopped vegetables. It’s a practical trick that turns your freezer into a more efficient food-saving tool.
- It’s a method that removes air to preserve food.
- Its main uses are preventing freezer burn and extending freshness.
- It helps your stored meats, cheeses, and produce last longer.
- It’s a popular food storage trick for saving money and reducing waste.
- It typically uses special bags or a vacuum sealer machine.
Below, we break down exactly how this process works and explore the key benefits you can get for your own kitchen. Let’s walk through the details together.
Understanding Vacuum Suction in Your Kitchen
Vacuum suction, in the home cooking context, is the process of pulling air out of a storage bag or container before sealing it. The goal is simple: remove oxygen. Oxygen is the main culprit that makes food spoil, go stale, or get freezer burn. By taking it out, you create an environment where food lasts much longer.
Why Air is Your Food’s Worst Enemy
Air contains oxygen, which kickstarts two main problems. First, it helps aerobic bacteria and mold grow, making food rot faster. Second, it causes moisture to evaporate from food. That’s why your steak gets those dry, gray spots in the freezer—that’s freezer burn. Vacuum sealing tackles both issues at once.
The Simple Science Behind the Seal
Think of it like this: air is a guest that overstays its welcome. A vacuum sealer is the polite bouncer that escorts it out. When you suck the air out, you collapse the bag tightly against the food. This limits bacterial growth and keeps the food’s own moisture locked in. Studies from the USDA confirm that proper vacuum packaging is one of the most effective ways to extend the shelf life of refrigerated and frozen foods.
How Vacuum Suction Actually Works
The basic principle involves creating a vacuum and then hermetically sealing a barrier material. For home cooks, this usually happens in one of two ways: with a dedicated countertop machine or with simpler, hand-operated tools.
The Two Main Tools for the Job
You don’t need industrial equipment. Most home systems fall into one of these categories:
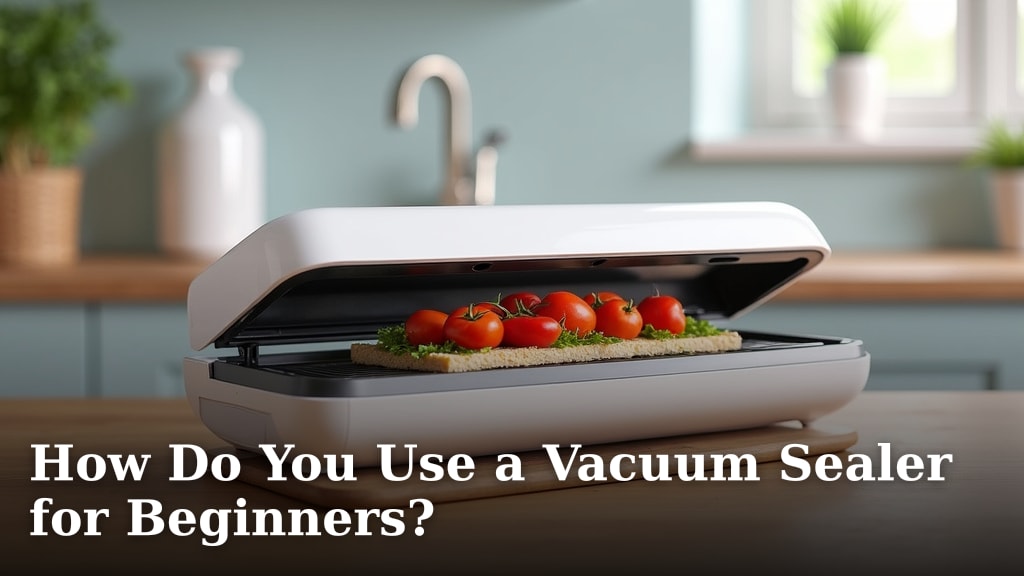
- Vacuum Sealer Machines: These countertop appliances have a suction pump and a heat bar. You place the open end of a special bag into the machine, it sucks the air out, and then the heat bar melts the plastic to create an airtight seal.
- Hand Pump or Water Displacement Methods: For a simpler approach, you can use zipper-style vacuum bags with a one-way valve. You seal the bag most of the way, then use a small hand pump to suck the air out through the valve. The water displacement method is even more old-school: you slowly lower an open bag of food into a pot of water, letting the water pressure push the air out before you seal the final inch.
What Are Those Special Bags Made Of?
Regular freezer bags won’t work. Vacuum bags are made from multi-layered plastics that are much stronger and less breathable. They’re designed to withstand the pressure of suction and the heat of sealing without tearing. Using the wrong bag is a common mistake that can lead to failed seals and wasted food.
Key Benefits for Your Home Kitchen
This isn’t just for professional chefs. We found that integrating vacuum sealing into home routines offers tangible, everyday advantages that make a real difference.
Drastically Extending Shelf Life
This is the number one benefit. By removing air, you can keep foods fresh for 3-5 times longer than traditional storage methods. For example, a roast that might last 6 months in the freezer with freezer burn could stay good for 2-3 years when vacuum sealed. That’s money saved on wasted groceries.
Ending Freezer Burn for Good
Freezer burn is dehydration caused by air exposure. It doesn’t make food unsafe, but it ruins the texture and flavor. Vacuum sealing creates such a tight barrier that it makes freezer burn virtually impossible. Your frozen berries will stay plump, and your steaks will remain juicy.
Keeping Food Safe and Fresh
Slowing down bacterial growth means your food stays safer for longer in the fridge. This is especially helpful for keeping leftovers, deli meats, and fresh fish at peak quality for an extra day or two. According to food safety guidelines, maintaining proper storage conditions is key to preventing foodborne illness.
Common Foods You Can Vacuum Seal
You can preserve much more than just meat. A wide variety of items benefit from this air-free storage method.
Best Items for Freezer Storage
- Meats and Poultry: Bulk purchases become economical. Portion out chicken breasts, ground beef, or pork chops before freezing.
- Seafood: Delicate fish fillets and shrimp are protected from the harsh freezer environment.
- Cheese: Hard and semi-hard cheeses last much longer without molding.
- Baked Goods: Cookies, bread, and bagels stay soft and fresh for months.
Smart Uses in the Fridge and Pantry
- Pre-cut Vegetables: Seal chopped onions, bell peppers, or celery for ready-to-cook convenience that stays crisp.
- Marinades: Sealing meat with marinade not only stores it but also speeds up the flavor-infusion process.
- Dry Goods: Flour, sugar, and nuts stay fresh longer and are protected from pantry pests.
Vacuum Sealer Machines: What to Look For
If you decide to buy a machine, you’ll find two main types. The right one depends on how often you plan to use it.
External Suction vs. Chamber Sealers
External suction models are the most common for home use. They are affordable and compact. You place the bag outside the machine, and it sucks the air through the open end. Chamber sealers are more powerful and used in many restaurants. You place the entire bag inside a chamber, which then pressurizes, allowing for a stronger seal and the ability to seal liquids easily. However, they are much bulkier and pricier.
| Feature | External Suction Sealer | Chamber Sealer |
|---|---|---|
| Best For | Average home cooks, occasional use. | Enthusiastic cooks, frequent use, sealing liquids. |
| Portability | Compact, easy to store. | Bulky, needs counter space. |
| Price Range | Most affordable option. | Significantly more expensive. |
| Liquid Handling | Difficult. Can suck up liquids into the pump. | Excellent. Liquids seal perfectly without mess. |
A Simple Step-by-Step Guide to Vacuum Sealing
Getting started is straightforward. Here’s the basic process for using a standard home machine.
- Prepare Your Food: Pat meats and other moist foods dry with a paper towel. Excess moisture can interfere with the seal.
- Fill the Bag: Place food in a vacuum bag, leaving 2-3 inches of empty space at the top. Don’t overfill.
- Position in Machine: Open the machine’s lid. Place the open end of the bag flat across the vacuum channel. Make sure the bag is straight and not wrinkled.
- Lock and Seal: Close and lock the lid. Press the appropriate button (usually “Vacuum & Seal”). Wait for the machine to suck the air out and automatically heat-seal the bag.
- Check Your Work: Once the cycle finishes, unlock the lid. The bag should be tightly conformed to the food with no air pockets and a solid, wide seal line.
Pro Tip: Use the Water Displacement Method
For delicate items like berries or for sealing bags without a machine, this trick works wonders. Fill a large basin with water. Place your food in a zipper-style vacuum bag and seal it almost completely, leaving a small corner open. Slowly lower the bag into the water. The pressure will push the air out through the open corner. Just before the bag is fully submerged, seal that final corner. It’s a gentle, effective way to get an air-free seal.
What You Should NOT Vacuum Seal
Not everything is a good candidate. Some items can be dangerous or simply won’t work well.
- Soft Cheeses and Breads: The strong suction can crush them.
- Raw Mushrooms: They contain active bacteria that can thrive in anaerobic (oxygen-free) environments, posing a risk of botulism if not handled correctly.
- Raw Onions and Garlic: They release gases that can spoil the food or break the seal.
- Very Hot Foods: Always let food cool to room temperature first. Sealing hot food creates condensation, which can lead to spoilage.
Checklist for Getting Started with Vacuum Sealing
Ready to dive in? Use this checklist to make sure you’re set up for success.
- I have chosen a sealer type (external or chamber) that fits my cooking habits.
- I have purchased the correct, high-quality vacuum bags or rolls for my machine.
- I know which foods are great candidates and which ones I should avoid.
- I have a plan for organizing my sealed items in the freezer with labels and dates.
- I understand the basic steps: prep, fill, position, seal, and check.
Keeping Your Sealer in Top Shape
A little maintenance ensures your machine works perfectly every time. The most common issue is a clogged vacuum channel or gasket. If your machine isn’t sucking well, check for food debris. Wipe the gasket with a damp cloth after each use. For the channel, use a small brush (like a toothbrush) to clean it out. Always let your machine cool down between several uses to prevent overheating.
We found that taking these simple care steps can significantly extend the life of your appliance. It’s a small effort that protects your investment and keeps your food safe.
Conclusion
So, vacuum suction for home cooks is simply a method of removing air to keep your food fresh far longer. As we’ve covered, it helps prevent freezer burn, saves money on waste, and works well for many foods. The key is using the right bags and following a straightforward process, whether with a machine or a simple hand pump. Now that you understand the benefits and the basics, you have the knowledge to decide if it’s right for your kitchen. Your next step could be trying it with a single, simple food item like berries or a chicken breast to see the difference for yourself.
Frequently Asked Questions
Is vacuum sealing worth the cost for a home cook?
Yes, we found it often is. While there’s an upfront cost for a machine and bags, the money you save from not throwing out spoiled food adds up quickly. If you buy groceries in bulk or hate finding freezer-burned items, it pays for itself over time.
Can I use any plastic bag with my vacuum sealer?
No, you cannot. Regular freezer bags or zip-top bags are too thin and will not create an airtight seal. You must use the specific, multi-layered vacuum bags or rolls designed for your machine. Using the wrong bags is a common mistake that leads to seal failure.
How long will vacuum-sealed food actually last?
It varies by food type and storage method, but generally much longer. In the freezer, vacuum sealing can extend the life of many foods to two to three years. In the fridge, it can keep meats and cheeses fresh for a few extra days beyond their normal shelf life.
What is the best way to vacuum seal liquids like soups or marinades?
The most effective method is using a chamber vacuum sealer. These machines seal the entire bag inside a pressurized chamber, which keeps liquids from being sucked into the pump. For home cooks with an external suction sealer, we recommend freezing the liquid in a bag first, then sealing it.
Is there a safety risk with vacuum sealing certain foods?
There is a minor risk with raw, uncooked vegetables like onions or garlic, and with some mushrooms. These can release gases or harbor bacteria that thrive without oxygen. Always follow guidelines and avoid sealing these items raw for long-term storage.