How to Use a FoodSaver Handheld Vacuum Sealer
Charge the sealer, close the FoodSaver zipper bag or container, align the valve with the nozzle, and run the pump until the air is removed. Keep the valve area clean and stop before crushing soft food.
On this page (7 sections)
- How do you prepare a FoodSaver handheld vacuum sealer?
- How do you seal a FoodSaver zipper bag?
- How do you use a FoodSaver container with the handheld sealer?
- Which products help with FoodSaver vacuum sealing?
- How do you store food after vacuum sealing?
- How should you clean and care for the sealer?
- What is the best way to use a FoodSaver handheld vacuum sealer?
Here's how to use a FoodSaver handheld vacuum sealer: charge it, close the zipper bag or container, center the nozzle over the valve, and run the pump until the air is removed. Keep food away from the valve, and check the closure before storing the food.
A handheld sealer removes air through a valve. It doesn't heat-seal the open edge of a bag, so it works with compatible FoodSaver zipper bags and containers that have a vacuum valve.
If you're new to this type of tool, What Exactly Is a Handheld Suction Sealer? explains how it differs from a countertop suction sealer.
How do you prepare a FoodSaver handheld vacuum sealer?
Charge the handheld sealer before you start, then clean and dry the valve area. Place the food in the bag or container with enough space around the closure for it to seal completely.
Read the sealer's charging instructions before connecting power. Let the unit charge fully if it has been stored for a while or if the motor stops during a cycle.
For zipper bags, leave the valve exposed and keep crumbs, grease, and moisture away from the zipper and valve. For containers, check that the lid sits evenly on the rim before you begin.
Do not fill a zipper bag to the top. Extra space gives the bag room to tighten around the contents without pulling food into the valve.
What should you check before sealing a zipper bag?
Close the zipper from one end to the other before placing the nozzle on the valve. Run your fingers across the closure to check for an open section, folded plastic, or food caught in the track.
Lay the bag flat if the contents allow it. Keep sharp bones or corners from pressing directly against the plastic, since a puncture can let air back in.
For a closer look at this style of equipment, see our FoodSaver Mini FS3100 handheld vacuum sealer reviews.
How do you seal a FoodSaver zipper bag?
Center the handheld sealer over the bag's valve, hold it flat, and run the pump until the bag tightens around the food. Keep the nozzle steady so air leaves through the valve instead of leaking around the connection.
- Put the food inside the FoodSaver zipper bag.
- Spread the food into a flat layer where practical.
- Close the zipper fully.
- Place the bag on a flat surface with the valve facing up.
- Center the sealer nozzle over the valve.
- Start the pump and hold the nozzle in place.
- Stop when the bag is snug around the food.
- Remove the nozzle and inspect the zipper and valve.
Don't pull the nozzle away while the pump is running. A sudden gap can interrupt suction and leave air inside the bag.
Don't keep pumping after delicate food is compressed. Berries, bread, and other soft foods may lose their shape if you remove more air than the food can tolerate.
How can you fix a zipper bag that will not hold a vacuum?
Check the zipper, valve, bag surface, and nozzle connection in that order. The most common causes are an incomplete zipper closure, food near the valve, a wrinkled valve area, or a nozzle that is not centered.
Run your fingers over the full zipper track and press it closed again. Wipe moisture or food from the valve area, then flatten the bag around the valve.
If the bag inflates again after sealing, inspect it for holes and sharp food edges. Move the contents to a new compatible bag when the original has been punctured.
Our guide to how to use a vacuum sealer pump covers the same nozzle-and-valve approach in more detail.
How do you use a FoodSaver container with the handheld sealer?
Put food in the container, close the lid evenly, align the nozzle with the lid valve, and pump until the lid is held firmly. The valve and lid must stay clean so air cannot enter around the connection.
Leave enough space between the food and lid for the vacuum to work. Wipe the rim and lid if food or liquid is preventing an even fit.
Place the nozzle directly over the valve. Hold it flat while the sealer runs, then stop and remove it carefully.
After removing the nozzle, check that the lid remains secure. If it lifts easily or air returns quickly, release the vacuum according to the container instructions, clean the seal area, and try again.
Don't use the handheld sealer on a container without a compatible valve. The nozzle needs a sealed path to remove air.
Which products help with FoodSaver vacuum sealing?
The right choice depends on whether you want a heat-sealing countertop machine, custom-size rolls, or a separate sealer with adjustable vacuum settings.
The FoodSaver FM2100 measures 16.3 x 9.2 x 4 in and weighs 6.6 lb. It has dual heat sealing strips, a built-in roll cutter, and a package with an 11 x 10 ft roll, 3 1-quart bags, 2 1-gallon bags, and an accessory hose.
Choose it when you want to make custom heat-seal bags or use FoodSaver accessories alongside handheld sealing. Its dry and moist food options suit everyday storage, while the machine takes more counter space than a handheld tool.
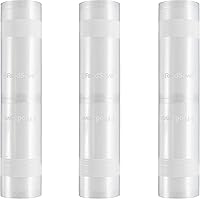
The FoodSaver Custom Fit Vacuum Sealer Rolls are 11 x 16 ft rolls in a 3-pack. They are reusable, airtight, and designed for FoodSaver vacuum sealing systems, with freezer, refrigerator, microwave, and boil-safe use described for the material.
Choose these rolls when bag size changes from one food item to the next. They require a compatible heat-sealing system, so they do not replace the zipper bags used directly with a handheld valve sealer.
The Nesco Deluxe Food VS-12 measures 15.75 x 8 x 4.5 in and weighs 6 lb. It includes an 8.6 x 9.85 ft roll and an 11.8 x 9.85 ft roll, plus built-in roll storage, a sliding bag cutter, and a viewing lid.
Choose it when you want separate dry and moist modes, a gentle vacuum option, and double sealing for heat-seal bags. It is a corded electric countertop machine, not a replacement for the portable valve connection used by a handheld sealer.
For more options, compare our guide to the best handheld vacuum sealer for food.
How do you store food after vacuum sealing?
Label the sealed food and move it to the correct storage location without treating vacuum sealing as a substitute for safe temperature control. Vacuum sealing removes air, but it doesn't make perishable food safe at room temperature.
Refrigerate or freeze food according to its type and your food-safety plan. Keep raw and cooked foods separate, and clean the valve, lid, and work surface after handling raw food.
The USDA's food safety guidance for freezing and food storage explains why packaging and temperature control still matter.
Check sealed bags and containers before use. If a bag has lost its vacuum, a zipper has opened, or a container lid is no longer secure, inspect the food and follow safe-storage guidance rather than resealing it automatically.
How should you clean and care for the sealer?
Keep the nozzle, valve area, zipper track, container rim, and lid gasket clean and dry. Disconnect the sealer from power when cleaning and follow the care instructions for the unit and accessories.
Wipe food residue from the outside of the bag before placing the nozzle over the valve. Empty and clean containers after use so residue does not interfere with the next seal.
Store the handheld unit and accessories where the nozzle won't collect dust. Avoid bending the valve area of a zipper bag during storage, since a distorted valve may not seal correctly.
A handheld sealer is useful for small portions and containers. A countertop machine is better when you need repeated heat-sealed bags, custom lengths, or stronger control over dry and moist foods.
You can also compare What Exactly Is a Suction Vacuum Sealer? with What Exactly Is a Countertop Vacuum Sealer? before choosing a system.
What is the best way to use a FoodSaver handheld vacuum sealer?
Choose compatible FoodSaver zipper bags or containers, close the seal fully, align the nozzle with the valve, and stop once the package is tight. Cleaning the valve and checking for punctures solve many failed cycles.
Choose the FoodSaver FM2100 when you also need roll storage, a cutter, heat sealing, and an accessory hose. Choose the FoodSaver rolls for custom heat-seal bags, or the Nesco VS-12 for corded dry, moist, gentle, and double-seal controls.
If counter space is limited, compare the best compact vacuum sealer with roll storage and the best vacuum sealers under 100 dollars before buying.
Frequently asked questions
How do you charge a FoodSaver handheld vacuum sealer?
Use the charging method and power connection supplied with your FoodSaver handheld sealer, then allow it to charge before sealing. A charged unit should run without stopping during the bag or container cycle.
If suction fades quickly, recharge it before checking the valve, gasket, or bag closure.
Where should the FoodSaver handheld sealer sit on the valve?
Center the sealer nozzle directly over the valve on the FoodSaver zipper bag or container lid. Keep the nozzle flat and hold it in place while air leaves the container.
A crooked connection can pull air from around the valve instead of from inside the bag or container.
Can you use a FoodSaver handheld sealer with regular bags?
Use FoodSaver zipper bags made for handheld vacuum sealing, not ordinary storage bags. Regular bags do not have the matching valve and may not hold a vacuum.
For heat-seal work, use a compatible FoodSaver vacuum sealing system and heat-seal bags or rolls instead.
How do you know when to stop vacuum sealing?
Stop when the bag has tightened around the food or the container has reached the vacuum level you need. Soft food can be crushed if you continue too long.
Close the zipper fully before pumping, and inspect the valve and seal after removing the nozzle.